The journey to running Nerves on a Kobo Clara e-reader

For a few years now, I’ve been hesitant to buy an e-reader. I dislike that most of them have closed ecosystems. I was waiting for a “hacker-friendly” device and had high hopes for the PineNote. Unfortunately, the price tag of the PineNote and the difficulty of getting my hands on one left me without a “cheap” alternative. The PineNote is also much more than an e-reader and significantly larger, while I was looking for an open, pocket-sized device.

Kobo is a Toronto-based company that has released several e-reading devices over the past decade, and they have had a small, active hacker community building apps and plugins for their products. Initially, their devices shipped with an internal SD card you could replace with another operating system after opening the device, but later models now run their software on eMMC. Since they offered a cheap 6-inch entry model, the Clara (BW and Color), I decided to give it a try and ordered the Clara Color.

Kobo Clara Color

Ever since I started porting Buildroot and Nerves to exotic devices (running Nerves on Android e-waste), each time I get a consumer device in my hands, the first question that pops into my head is:

Will it run Nerves?

This topic is about answering that question and documenting my journey to understand how the device works and how to access relevant information so I can maybe build a Nerves firmware for it. I have no clue if I will make it, but documenting the process and progress might be interesting to some people here.

I’ll be adding posts to this topic, at random intervals, with my progress in the hope of helping demystify what it takes to get Nerves and Elixir running on consumer products and to inspire others to try to do the same.

15 Likes

Getting to know Clara

My first step is to figure out what information I can get from the device without opening it. The back cover shows that it’s a N367B model.

Since Kobo apparently has partnered with ifixit, I was able to find some guides showing the devices motherboards. There are two models the N367 and N367B.

We can clearly see a UART port on the top-left side of the N367 motherboard. A UART port is an asynchronous serial interface that uses separate TX (transmission) and RX (reception) lines for bidirectional communication.

On the right side of N367B motherboard, there seems to be something similar but without the same markings, so it would need some further investigation later on.

Why am I trying to figure out if there is a UART port somewhere? Because on most devices, this is where boot messages get printed. You can see what happens in the boot chain and, for linux based systems, the kernel messages, just like when your computer starts. This gives a lot of valuable information to create a bootable system later on. Some manufacturers use a UART port to flash the device before they leave the factory.

So, as finding a suitable UART port would require further investigation on my model and I didn’t want to open it up right away, I started trying to figure out if there was a way to stop the boot process and put the device in either fastboot mode or something else. Usually, you need to find a sequence of actions to perform when the device boots to get there.

Fastboot mode

I tried pressing the power button multiple seconds before pluging the usb cable, different combinations of pluging, unplugging, pressing the button etc… But it was not it.

Some devices sometimes require the host to “poll” the device with a fastboot command for them to interrupt their booting process. So,here’s how I managed to get it into fastboot.

  1. Turn off and unplug the Clara from your computer
  2. Launch the fastboot getvar all command on your computer
  3. Plug the Clara to your computer
  4. Quickly hold the power button until you see information in your host console
  5. Release the power button
  6. The Clara is now in fastboot mode

This is what you should get in your terminal:

➜  ~ fastboot getvar all
< waiting for any device >
(bootloader) 	hwcfg.PCB: [0] PCB=0x71
(bootloader) 	max-download-size: 0x1e00000
(bootloader) 	version: 0.5
all: Done!!
Finished. Total time: 0.003s

It doesn’t tell us much for now, but having the Clara in fastboot is useful if we want to flash existing partitions, or if we want to try a new boot image without flashing the emmc and potentially bricking it.

To get out of fastboot mode, just press the power button approximately 10 seconds.

Investigating the filesystem

When plugging the Clara to your computer, you can mount it as a mass storage device and put books on it. So let’s see what’s on that partition:

➜  KOBOeReader ls
fonts
➜  KOBOeReader ls -la
total 8364
drwxr-xr-x   7 marc marc    8192 jan  1  1970 .
drwxr-x---+  3 root root    4096 nov 15 12:13 ..
drwxr-xr-x   2 marc marc    8192 nov 14 10:19 .adobe-digital-editions
drwxr-xr-x   3 marc marc    8192 aoû 28 11:10 fonts
drwxr-xr-x  11 marc marc    8192 nov 15 12:13 .kobo
drwxr-xr-x  49 marc marc    8192 nov 14 11:36 .kobo-images
➜  KOBOeReader 

This kobo dot folder seems interesting, let’s check what’s in it:

➜  KOBOeReader ls -la .kobo
total 576
drwxr-xr-x 11 marc marc   8192 nov 15 12:13 .
drwxr-xr-x  7 marc marc   8192 jan  1  1970 ..
-rw-r--r--  1 marc marc     25 nov 14 10:19 affiliate.conf
drwxr-xr-x  2 marc marc   8192 nov 14 11:34 assets
drwxr-xr-x  2 marc marc   8192 nov 14 11:35 audiobook
-rw-r--r--  1 marc marc  19456 nov 15 12:06 BookReader.sqlite
drwxr-xr-x  2 marc marc   8192 nov 14 10:19 certificates
drwxr-xr-x  2 marc marc   8192 nov 14 11:34 custom-dict
-rw-r--r--  1 marc marc     75 nov 14 10:19 device.salt.conf
drwxr-xr-x  2 marc marc   8192 nov 14 11:35 dict
drwxr-xr-x  2 marc marc   8192 nov 14 11:36 dropbox
-rw-r--r--  1 marc marc   3072 nov 14 11:34 fonts.sqlite
drwxr-xr-x  2 marc marc   8192 nov 14 11:34 guide
drwxr-xr-x  2 marc marc   8192 nov 14 11:34 kepub
drwxr-xr-x  2 marc marc   8192 nov 14 10:19 Kobo
-rw-r--r--  1 marc marc 427008 nov 15 12:13 KoboReader.sqlite
-rw-r--r--  1 marc marc    105 nov 14 10:19 ssh-disabled
-rw-r--r--  1 marc marc     82 nov 15 12:12 version

Hang on… What is this ssh-disabled file…

To enable ssh:
- Rename this file to ssh-enabled
- Reboot the device
- Connect via: ssh root@<device_ip>

Ok, this is exciting :star_struck: Having ssh access as root would allow us to gather everything we need to run buildroot and Nerves on this thing.

SSH access

After renaming that file and ejecting the device, getting it’s IP from my dhcp server lease list, I was, as promised, able to connect to the Clara as root… :confetti_ball:

[root@kobo ~]# uname -a
Linux kobo 4.9.77 #1 SMP PREEMPT d226bc7bf-20250103T160218-B0103160930 armv7l GNU/Linux
[root@kobo ~]# cat /proc/cpuinfo 
processor	: 0
Processor	: ARMv7 Processor rev 4 (v7l)
model name	: ARMv7 Processor rev 4 (v7l)
BogoMIPS	: 15.60
Features	: half thumb fastmult vfp edsp neon vfpv3 tls vfpv4 idiva idivt vfpd32 lpae evtstrm aes pmull sha1 sha2 crc32 
CPU implementer	: 0x41
CPU architecture: 7
CPU variant	: 0x0
CPU part	: 0xd03
CPU revision	: 4

Hardware	: MediaTek MT8110 board
Revision	: 0000
Serial		: 1234567890ABCDEF
[root@kobo ~]# ls -la /dev/disk/by-partlabel/
total 0
drwxr-xr-x    2 root     root           280 Nov 15 12:21 .
drwxr-xr-x    7 root     root           140 Nov 15 12:21 ..
lrwxrwxrwx    1 root     root            15 Nov 15 12:21 UBOOT -> ../../mmcblk0p2
lrwxrwxrwx    1 root     root            15 Nov 15 12:21 bl2 -> ../../mmcblk0p1
lrwxrwxrwx    1 root     root            15 Nov 15 12:21 boot_a -> ../../mmcblk0p4
lrwxrwxrwx    1 root     root            15 Nov 15 12:21 hwcfg -> ../../mmcblk0p6
lrwxrwxrwx    1 root     root            15 Nov 15 12:21 ntxfw -> ../../mmcblk0p7
lrwxrwxrwx    1 root     root            15 Nov 15 12:21 nvram -> ../../mmcblk0p3
lrwxrwxrwx    1 root     root            16 Nov 15 12:21 recovery -> ../../mmcblk0p11
lrwxrwxrwx    1 root     root            16 Nov 15 12:21 system_a -> ../../mmcblk0p10
lrwxrwxrwx    1 root     root            15 Nov 15 12:21 tee_a -> ../../mmcblk0p5
lrwxrwxrwx    1 root     root            16 Nov 15 12:21 userdata -> ../../mmcblk0p12
lrwxrwxrwx    1 root     root            15 Nov 15 12:21 vendor -> ../../mmcblk0p9
lrwxrwxrwx    1 root     root            15 Nov 15 12:21 waveform -> ../../mmcblk0p8
[root@kobo ~]# 

This tells us already quite a lot of things:

  • It’s running an old kernel, probably custom
  • It’s an Armv7 32 bits
  • It seems to rely on AB partitioning and has partitions dedicated to configuration, waveform information for the e-ink screen, etc…

I now need to understand a bit better how all of this is wired up, and also which drivers are used.

[root@kobo ~]# lsmod
wlan_drv_gen4m 1908365 0 - Live 0xbf14a000 (O)
wmt_cdev_bt 16871 0 - Live 0xbf141000 (O)
wmt_chrdev_wifi 12825 1 wlan_drv_gen4m, Live 0xbf138000 (O)
wmt_drv 1059215 4 wlan_drv_gen4m,wmt_cdev_bt,wmt_chrdev_wifi, Live 0xbf000000 (O)

lsmod doesn’t provide much info so I’m assuming there is a lot of stuff compiled within the kernel and some custom logic happening in the init proces. Time to dig into the filesystem and the different partitions! :nerd_face:

17 Likes

Love this! Following with a lot of interest :slight_smile:

2 Likes

Me too! This is proper hacker stuff :nerd_face:

1 Like

Time for more exploration

With root access to the ereader, I can get more info and copy what I need to the userdata partition where the books are stored. This is the partition that gets mounted as a USB mass storage device on my computer so I can easily fetch dumped files from it. It’s mount path on the Kobo is /mnt/onboard.

Let’s get the kernel config:

[root@kobo ~]$ zcat /proc/config.gz > /mnt/onboard/kernel.defconfig

I would also like to get a dump of several partitions so I can dig into them later if needed. I use the dd command for this.

[root@kobo ~]$ dd if=/dev/mmcblk0p4 of=/mnt/onboard/mmcblk0p4.img

For the system_a partition, since this is the booted system, it’s safer to remount it as read-only (when it works) before doing it, since the system can be in constant change depending on how it’s been configured.

[root@kobo ~]$ mount -o remount,ro /

It worked without any warnings so I could dump mmcblk0p10 without issues.

Understand the partition table

There is still something I’d like to know. Some partitions have _a suffixes. This makes it seem like there is some kind of A/B partitioning going on but I’m not sure. There might be some empty space between partitions that would somehow be used after rewriting the GPT partition table. Knowing when partitions start and end would let us see what we want.

Unfortunately, the fdisk that the Kobo ships with doesn’t support GPT partition tables…

[root@kobo ~]$ fdisk -l /dev/mmcblk0
Disk /dev/mmcblk0: 15 GB, 15678308352 bytes, 30621696 sectors
1898 cylinders, 256 heads, 63 sectors/track
Units: sectors of 1 * 512 = 512 bytes

Device       Boot StartCHS    EndCHS        StartLBA     EndLBA    Sectors  Size Id Type
/dev/mmcblk0p1    0,0,2       1023,255,63          1 4294967295 4294967295 2047G ee EFI GPT 

It just shows one big partition, which means it was probably not compiled with GPT support enabled and there is nothing else on the Kobo system that can be helpful…

The only thing we can do is dump the GPT partition table from the disk. It should start at the third sector of the disk (a sector is 512 bytes, first one is MBR, second is the GPT header). Each table entry is 128 bytes. Let’s read the first 6 sectors of the table just in case. Since each partition table entry is 128 bytes, we will be reading 6*512/128=24 entries, which is more than enough.

[root@kobo ~]$ dd if=/dev/mmcblk0 bs=512 skip=2 count=6 | hexdump -C
6+0 records in
6+0 records out
3072 bytes (3.0KB) copied, 00000000  af 3d c6 0f 83 84 72 47  8e 79 3d 69 d8 47 7d e4  |.=....rG.y=i.G}.|
00000010  4a 5e ea ad fa 9b fc 47  96 4d 8f 76 be 94 7b 73  |J^.....G.M.v..{s|
00000020  00 04 00 00 00 00 00 00  ff 07 00 00 00 00 00 00  |................|
00000030  00 00 00 00 00 00 00 00  62 00 6c 00 32 00 00 00  |........b.l.2...|
00000040  00 00 00 00 00 00 00 00  00 00 00 00 00 00 00 00  |................|
*
00000080  af 3d c6 0f 83 84 72 47  8e 79 3d 69 d8 47 7d e4  |.=....rG.y=i.G}.|
00000090  6c 11 c8 2c 0f 1d ad 42  bc 97 a2 ab 54 75 e3 6a  |l..,...B....Tu.j|
000000a0  00 08 00 00 00 00 00 00  ff 0f 00 00 00 00 00 00  |................|
000000b0  00 00 00 00 00 00 00 00  55 00 42 00 4f 00 4f 00  |........U.B.O.O.|
000000c0  54 00 00 00 00 00 00 00  00 00 00 00 00 00 00 00  |T...............|
000000d0  00 00 00 00 00 00 00 00  00 00 00 00 00 00 00 00  |................|
*
00000100  af 3d c6 0f 83 84 72 47  8e 79 3d 69 d8 47 7d e4  |.=....rG.y=i.G}.|
00000110  ea f1 8f 89 97 05 e8 45  8e d7 74 5f 4b 6e c6 c8  |.......E..t_Kn..|
00000120  00 90 00 00 00 00 00 00  ff 97 00 00 00 00 00 00  |................|
00000130  00 00 00 00 00 00 00 00  6e 00 76 00 72 00 61 00  |........n.v.r.a.|
00000140  6d 00 00 00 00 00 00 00  00 00 00 00 00 00 00 00  |m...............|
00000150  00 00 00 00 00 00 00 00  00 00 00 00 00 00 00 00  |................|

...

We can see all the partitions we already saw before, and the hex values of their start and end blocks are somewhere in the output. However, we need to translate this, and at this point, we might as well ask our friend Claude for some assistance…

This is what he says based on the partition table hexdump and some additional context I gave him:

[ON] :robot:

# Name Start LBA End LBA Size (sectors) Size (MB) Gap After
1 bl2 1,024 2,047 1,024 0.5 0
2 UBOOT 2,048 4,095 2,048 1.0 32,768
3 nvram 36,864 38,911 2,048 1.0 0
4 boot_a 38,912 137,215 98,304 48 0
5 tee_a 137,216 145,407 8,192 4.0 0
6 hwcfg 145,408 147,455 2,048 1.0 0
7 ntxfw 147,456 149,503 2,048 1.0 0
8 waveform 149,504 169,983 20,480 10.0 0
9 vendor 169,984 268,287 98,304 48 21,504
10 system_a 289,792 2,386,943 2,097,152 1,024 0
11 recovery 2,386,944 4,484,095 2,097,152 1,024 0
12 userdata 4,484,096 30,621,567 26,137,472 12,762.4 129

Two gaps:

  • 16 MB (32,768 sectors) between UBOOT and nvram
  • 10.5 MB (21,504 sectors) between vendor and system_a

Total device size: 30,621,696 sectors (14.6 GB)

Last partition ends at: 30,621,567 sectors

Unallocated space: 129 sectors (64.5 KB)

[OFF] :robot:

So, our friend is clear, there doesn’t seem to be any significant empty space on the disk. The _a suffix is just a naming convention they used. There is a recovery partition that exists which has the same size as system_a, which is likely used when system_a is detected as corrupted by the bootloader.

What Kernel is this?

At first glance, 4.9 is an old kernel. But looking into it’s config, we might find additional information. I have transfered all the files I wanted on my computer to continue my investigations.

➜  cat kernel.defconfig | grep ANDROID
CONFIG_ANDROID_PARANOID_NETWORK=y
CONFIG_ANDROID_DEFAULT_SETTING=y
# CONFIG_USB_G_ANDROID is not set
# CONFIG_ANDROID_LOGGER is not set
# CONFIG_ANDROID_LOW_MEMORY_KILLER is not set
CONFIG_ANDROID_INTF_ALARM_DEV=y
CONFIG_ANDROID=y
CONFIG_ANDROID_BINDER_IPC=y
CONFIG_ANDROID_BINDER_DEVICES="binder,hwbinder,vndbinder"
# CONFIG_ANDROID_BINDER_IPC_32BIT is not set
# CONFIG_ANDROID_BINDER_IPC_SELFTEST is not set

Usually, having a bunch of _ANDROID_ config options means it’s an Android kernel and not mainline. This is not a good sign…

I started looking at available resources on Kobo kernels, and since there is a large community of hackers for old Kobo devices, I could find the Kobolabs git repository where Kobo actually releases tarballs of their kernels and toolchain :slight_smile:

It confirmed my assumption that it was an Android kernel, but also that the kernel source includes a lot of Mediatek stuff… The repo also includes the source code for the wifi driver and the u-boot they used.

It means that in order to use a recent mainline kernel, I’d need to port all these changes which is a significant amount of work and I’m far from being a kernel developer. I’m definitely not fluent enough in C and I would need to not only mainline the Mediatek parts, but also the wifi driver part if I don’t want a subpar experience with it.

But even if I managed to do this, there is still a major question that needs answering:

Is it using secure boot?

8 Likes

Figuring out what happens at boot

Kobo releases the bootloader source code as well as the kernel sources it uses for their devices here.

After downloading and extracting both, I started investigating a bit more. The first thing I looked at is the bootloader config, and more specifically for any signs of secureboot config options.

But for this, I first need to know which config file I need to look into. I know from cat /proc/cpuinfo that my SOC is of the mediatek MT811x family but I have no clue yet what I should be looking into in this list:

➜  configs ls mt811*
mt8110_m1_emmc_defconfig
mt8110_p2_d1_emmc_defconfig
mt8112_p1_defconfig
mt8113_p1_emmc_defconfig
mt8110_p1_emmc_defconfig
mt8110_p2_d2_emmc_defconfig
mt8113_lp1_emmc_defconfig
mt8113_tp1_emmc_defconfig

Maybe I can find something useful in how the device is initialized, and since I have root access, it shouldn’t be that hard. The device uses busybox init and has this in its /etc/inittab file:

[root@kobo ~]# cat /etc/inittab
# This is run first except when booting in single-user mode.
::sysinit:/etc/init.d/rcS
::respawn:/sbin/kobo_getty.sh
::ctrlaltdel:/sbin/reboot
::shutdown:/etc/init.d/rcK
::restart:/sbin/init

Here’s what /etc/init.d/rcS actually does. I only kept the relevant bits:

  • Platform detection: Identifies the Kobo device platform (Freescale, MTK8113T, etc.) and hardware configuration by checking some data into mmcblk0p6
  • Partition management: Determines rootfs and onboard storage partitions based on platform (mmcblk0p10 in the case of a mt8113t-ntxplatform, and p1 in other cases. Since p10 is actually mounted, it means our platform is identified as mt8113t-ntx)
  • User authentication: Handles password file creation and updates for user management when ssh is enabled through a file as mentioned in the first posts
  • Filesystem mounting: Mounts proc, tmpfs, sysfs, and various temporary directories
  • U-Boot environment: Manages bootloader environment variables for different boot modes (normal/recovery) if you press the screen at certain coordinates (1070 250 150 600 for our system)
  • Device initialization: Sets up udev for hardware detection and device node creation
  • Platform-specific setup: Loads firmware, initializes display drivers, and configures platform services
  • Filesystem checks: Runs dosfsck on onboard partition and checks for corruption
  • Firmware upgrades: Processes Kobo.tgz and KoboRoot.tgz update packages from onboard storage, which is how updates are distributed by Kobo and the rcS flashes the partitions
  • Network configuration: Configures WiFi module and interface based on detected hardware
  • System services: Starts D-Bus, SSH, and launches Kobo applications (Nickel, hindenburg)
  • Environment setup: Sets locale, Qt, and library paths for the Kobo software stack

It does quite a lot of things actually, but it at least gives us the indication that we are running on an MT8113T SOC, so we can conclude that the u-boot config file we should be looking into is mt8113_tp1_emmc_defconfig. But let’s make absolutely sure of this.

Looking into partition contents

When we listed the partitions above, we discovered that there was a boot_a partition. Since this would likely be where the devicetree and kernel is located, there is probaby some information we can get from it. So let’s dump it using dd, transfer it to my computer and try to look at what’s inside using hexdump.

➜  Partitions hexdump -C -n 256 mmcblk0p4.img
00000000  d0 0d fe ed 00 e1 69 8f  00 00 00 38 00 e1 67 74  |......i....8..gt|
00000010  00 00 00 28 00 00 00 11  00 00 00 10 00 00 00 00  |...(............|
00000020  00 00 00 ca 00 e1 67 3c  00 00 00 00 00 00 00 00  |......g<........|
00000030  00 00 00 00 00 00 00 00  00 00 00 01 00 00 00 00  |................|
00000040  00 00 00 03 00 00 00 04  00 00 00 83 67 77 9b 83  |............gw..|
00000050  00 00 00 03 00 00 00 49  00 00 00 00 55 2d 42 6f  |.......I....U-Bo|
00000060  6f 74 20 66 69 74 49 6d  61 67 65 20 66 6f 72 20  |ot fitImage for |
00000070  50 6f 6b 79 20 28 59 6f  63 74 6f 20 50 72 6f 6a  |Poky (Yocto Proj|
00000080  65 63 74 20 52 65 66 65  72 65 6e 63 65 20 44 69  |ect Reference Di|
00000090  73 74 72 6f 29 2f 34 2e  39 2f 61 75 64 38 31 31  |stro)/4.9/aud811|
000000a0  33 74 70 31 00 00 00 00  00 00 00 03 00 00 00 04  |3tp1............|
000000b0  00 00 00 0c 00 00 00 01  00 00 00 01 69 6d 61 67  |............imag|
000000c0  65 73 00 00 00 00 00 01  6b 65 72 6e 65 6c 40 31  |es......kernel@1|
000000d0  00 00 00 00 00 00 00 03  00 00 00 0d 00 00 00 00  |................|
000000e0  4c 69 6e 75 78 20 6b 65  72 6e 65 6c 00 00 00 00  |Linux kernel....|
000000f0  00 00 00 03 00 df f0 00  00 00 00 1b 56 32 04 eb  |............V2..|
00000100

It shows clearly that it is a U-Boot FIT image and it likely contains the kernel and devicetree indeed :slight_smile:

With uboot-tools, we can actually show much more valuable information.

➜  Partitions mkimage -l mmcblk0p4.img
Image contains unit addresses @, this will break signing
FIT description: U-Boot fitImage for Poky (Yocto Project Reference Distro)/4.9/aud8113tp1
Created:         Fri Jan  3 09:10:43 2025
 Image 0 (kernel@1)
  Description:  Linux kernel
  Created:      Fri Jan  3 09:10:43 2025
  Type:         Kernel Image
  Compression:  uncompressed
  Data Size:    14675968 Bytes = 14332.00 KiB = 14.00 MiB
  Architecture: ARM
  OS:           Linux
  Load Address: 0x40008000
  Entry Point:  0x40008000
  Hash algo:    sha256
  Hash value:   0a962151b27cbf88ae94098ddbcc561cbc3c5f4dfc6a8ddee8a10f7cf50f389f
 Image 1 (fdt@1)
  Description:  aud8113tp1-E60T00-D0x00-8113T.dtb
  Created:      Fri Jan  3 09:10:43 2025
  Type:         Flat Device Tree
  Compression:  uncompressed
  Data Size:    47651 Bytes = 46.53 KiB = 0.05 MiB
  Architecture: ARM
  Load Address: 0x44000000
  Hash algo:    sha256
  Hash value:   4f5c5fd5fbfbc126fa30bc3b8949dba3e651fa09210bc4dcf76be2a9829ba372
 Image 2 (fdt@2)
  Description:  aud8113tp1-E60T00-D0x00-BW.dtb
  Created:      Fri Jan  3 09:10:43 2025
  Type:         Flat Device Tree
  Compression:  uncompressed
  Data Size:    46771 Bytes = 45.67 KiB = 0.04 MiB
  Architecture: ARM
  Load Address: 0x44000000
  Hash algo:    sha256
  Hash value:   0af777efe8d4736e6d695ef147b215835483f714219d0df4afc8dc77ae50ea27
 Default Configuration: 'conf@1'
 Configuration 0 (conf@1)
  Description:  Boot Linux kernel with FDT blob
  Kernel:       kernel@1
  FDT:          fdt@1
  Sign algo:    sha256,rsa2048:dev
  Sign value:   9411d831223692aabcf85d23f6ea6a9d9fb685f59daa10f4272aeea6ca64d0a04c3d4a210522969c9a4fda7d991a0e3823c91d6859e2a360b64b27a3b345db7510bef573427fa26d098c31cb7a740902744b92a48741d5f165085d7c921447f1eaf683dbe94822ab6905c161859f409942121c177547ad1f91a40100854dbb253c0dc116501c5dfe38108c761ddcfad581c8f8ecc4fb3b338bd6826b7e430862af1cd7a63dcbebc949c91584abeaf77f1ccb05f53c8977799f073defb18384c9c303f549da2fc315a363a11013ff19b3b01eeaa45f21824809f9a6a8be85b7446a1a3c74211e8465c1ea54b12203e6ad1bcebec358a8f7fa4ee98edf770f6e25
  Timestamp:    Fri Jan  3 09:10:43 2025

What this tells us:

  • the main device tree file is aud8113tp1-E60T00-D0x00-8113T.dtb
  • the Kernel, the devicetree and FIT image are signed
  • they are using yocto as a build system :smiley:

So our device is most likely an MT8113 TP1 and since our Kobo reader has emmc, I think we can be certain that the U-Boot defconfig we should be looking into is mt8113_tp1_emmc_defconfig.

In the file, we can find that these two options have been activated:

CONFIG_FIT=y
CONFIG_FIT_SIGNATURE=y

This tells us that U-Boot will verify the FIT image signature and its contents before booting it. That means it’s unlikely we will be able to boot another FIT image while keeping the same U-Boot on the Kobo.

Since we have the source code, we could change it’s config, rebuild it and try to flash it, but if the first level bootloader also checks the signature of the U-Boot image, we will just brick it.

There is only one thing left to do to figure that part out…

Opening it up and finding a serial port

I was pleasantly surprised to find a UART port just there on the left of the motherboard, waiting to be used :slight_smile:

By just inserting some jumper wires in the holes, I could connect the ground and RX to my FDTI serial dongle. I just needed to figure out the baudrate now.

Once more, having root access to the device made this step easy:

[root@kobo ~]# cat /proc/cmdline
console=ttyS0,921600n1 rootwait skip_initramfs earlycon=uart8250,mmio32,0x11002000 initcall_debug androidboot.hardware=mt8512 firmware_class.path=/vendor/firmware no_console_suspend root=/dev/mmcblk0p10 quiet hwcfg_p=0x5f2ffe00 hwcfg_sz=110 ntxfw_p=0x5f2fd800 ntxfw_sz=9474

There is a bunch of stuff we can ignore, the most important part for us is console=ttyS0,921600n1. So the baudrate is 921600. I just needed to start minicom and press the Kobo’s power button.

sudo minicom -D /dev/ttyUSB0 -b 921600

The entire boot log is quite long but here are some of the interesting parts:

starting app fitboot
failed to open MISC
choose first boot partition:UBOOT  , tee choose: tee_a
Verifying bootimg_ctl Sign
Verifying tz_ctl Sign
fit_verify_configed_sign key-name-hint: dev, result: 0
checking bootimg_ctl - kernel integrity
fit_verify_configed_sign key-name-hint: dev, result: 0
checking tz_ctl - kernel integrity
checking tz_ctl - tee integrity
checking bootimg_ctl - fdt integrity
LK run time: 2080062 (us)

# Some more logs

U-Boot 2019.04_295f85dcd-20240624T173725-B0624174002 (Jun 24 2024 - 17:40:01 +0800)

Model: MT8110 P1 EMMC
DRAM:  506 MiB
MMC:   mmc@11230000: 0
In:    serial@11002000
Out:   serial@11002000
Err:   serial@11002000
Net:   Net Initialization Skipped
No ethernet found.
Hit any key to stop autoboot:  0
switch to partitions #0, OK
mmc0(part 0) is current device

MMC read: dev # 0, block # 38912, count 1 ... 1 blocks read: OK

MMC read: dev # 0, block # 38912, count 28856 ... 28856 blocks read: OK

## Checking Image at 41000000 ...
   FIT image found
   FIT description: U-Boot fitImage for Poky (Yocto Project Reference Distro)/4.9/aud8113tp1

# The actual FIT image like we saw before

## Checking hash(es) for FIT Image at 41000000 ...
   Hash(es) for Image 0 (kernel@1): sha256+
   Hash(es) for Image 1 (fdt@1): sha256+
   Hash(es) for Image 2 (fdt@2): sha256+

# Log continues and loads the devicetrees and kernel

So, it seems like the FIT image is verified before U-Boot is even started, which seems to be consistent with what is documented in the mediatek secureboot documentation.

It’s unlikely that with my current knowledge, I can bypass secure boot, even with access to a serial port. It might be that there are exploits existing on Mediatek SOCs and shady tools I could use to try to find a way around it, but I couldn’t find something “off the shelf” to use.

At this point, the first picture that came to my head was the “Directed by Robert B. Weide” meme video… Then it got me thinking.

A way forward

There are two main blockers to figure out:

  • Inappropriate kernel version, config and secure boot enabled
  • The partition table is fixed and there is not enough empty space for a Nerves system

Let’s look at our options for each of them.

Inappropriate kernel config

Nerves requires additional kernel modules in order to work. It can be for filesystems (F2FS, Squashfs) or to set up ethernet over USB. As listed above, lsmod doesn’t give any output besides the wifi and BT drivers, which means that all modules were built-in the kernel.

A lot of Android kernels are locked like this. They usually don’t allow you to load external, unsigned modules. But I can check two things to see if that’s the case here:

  • Look into the kernel config
  • Compile a kernel module with the Kobo’s toolchain (also present in their git), and try to load it with insmod on the device

The good news here is that module support is indeed activated in the kernel config:

CONFIG_MODULES=y
# CONFIG_MODULE_FORCE_LOAD is not set
CONFIG_MODULE_UNLOAD=y
# CONFIG_MODULE_FORCE_UNLOAD is not set
CONFIG_MODVERSIONS=y
CONFIG_MODULE_SRCVERSION_ALL=y

It was expected since the wifi module is loaded in the rcS script. And we can also see that:

# CONFIG_MODULE_SIG is not set

Which means that this kernel can load any external, unsigned modules :slight_smile:
All I need to do is compile a module on my computer, send it to the Kobo over ssh and try to load it.

After installing the toolchain, and configuring the kernel menuconfig, I was able to have a f2fs.ko module, ready to be tested:

➜  modules_4.9.77 ls fs/f2fs
f2fs.ko

And it loaded without any issue on the Kobo :confetti_ball:

[root@kobo ~]# insmod lib/modules/4.9.77/fs/f2fs/f2fs.ko
[root@kobo ~]# lsmod
f2fs 217559 0 - Live 0xbf31d000
wlan_drv_gen4m 1908365 0 - Live 0xbf14a000 (O)
wmt_cdev_bt 16871 0 - Live 0xbf141000 (O)
wmt_chrdev_wifi 12825 1 wlan_drv_gen4m, Live 0xbf138000 (O)
wmt_drv 1059215 4 wlan_drv_gen4m,wmt_cdev_bt,wmt_chrdev_wifi, Live 0xbf000000 (O)

This gives me a way to extend the current kernel with additional modules.

Finding space in the partition table

One option is to resize the userdata partition and make space for a Nerves system but I would like to keep using the Kobo as an ereader AND boot Nerves when I want/need it. So I need a more “creative” plan.

During my work running Nerves on Android e-waste, I’ve used “subpartitions” for the Fairphone 2. It means that one of the existing partitions was flashed with an entire disk image with its own partition table. Using tools like kpartx in an initramfs allowed me to mount the Nerves system in the subpartitions.

I could do something similar here. I could “use” the existing Kobo system as if it were an initramfs, and, by modifying its init script, mount a Nerves system in a binary file stored in the userdata partition.

In order to see if that would work, I can test this with a buildroot system, built with the Kobo toolchain and see if I can pivot_root to it from the Kobo system.

If it works (I don’t see why it wouldn’t), then my next steps would be:

  • Make a basic Nerves System (without kernel and without bootloader)
  • Create some kind of “dual-boot” init script that will replace the one currently on the Kobo and implement a “boot Nerves when tap is detected on screen” and boot the Kobo system otherwise
  • Mount the Nerves system stored as a binary file on the userdata partition filesystem (so it can be uploaded as a regular file when needed)

I’ve got my work cut out for me…

4 Likes

Getting to a working buildroot system

Nerves can be seen as a “layer” on top of a Buildroot system. Buildroot is a build system that let’s you create a Linux root filesystem from scratch. It can also build the kernel and bootloader for you and packages it all in a nice image you can flash on an SD Card.

In order to have a working Linux device, you need at least three things:

  • A bootloader: a piece of code that initializes minimal hardware support to be able to launch a kernel. There can be different levels of bootloaders but let’s stick to this definition for this post
  • A kernel: the “code” that is being run first and manages processes, devices initialisation, memory management, …
  • A root filesystem: directories and files containing the programs you want to use, the libraries they depend on, some OS initialisation scripts, user management, your custom programs, …

The root filesystem is also refered to as the “userspace”.

On our Kobo, we already have a bootloader and a kernel that we cannot change (because of Secure Boot), so the only thing we need is a root filesystem that the kernel will mount to run its init script.

We also need a way to avoid booting on the Kobo OS and boot our own system instead. And we want to do that as soon as we can.

What happens at boot

Once the kernel kicks in, it mounts the partition that has the rootfs, usually passed as root= in the kernel command line, and will try to run /init or /sbin/init from it. It will run this script as PID1, meaning as the first process.

On our device, the cmdline has root=/dev/mmcblk0p10which means the kernel will mount /dev/mmcblk0p10 as / and run /sbin/init.

We need to replace this /sbin/init by something else, so that it will allow us to “switch” to our alternative root filesystem and execute that system’s /sbin/init instead.

This is actually what happens in a Nerves system. Instead or running the buildroot system’s /sbin/init, Nerves subsitutes it with erlinit, which gets ran as PID1.

Replacing Kobo’s /sbin/init

We need our replacement init script to do several basic things:

  • Mount all directories we need to be able to pivot to another system
  • Wait for an event to decide if we boot the alternate system
  • Mount our alternative system from and image somewhere on the userdata partition
  • Pivot to this system and run it’s /sbin/init as PID1

I’ve written this init script to do exactly that.

Here’s an extract of it, showing the most relevant parts. If a touch is detected on the screen during boot, we first try to mount our image file containing the alternative rootfs, then we use pivot_root to use that system’s root as / and have the old root mounted in .oldroot. We then move all the relevant mounts to the new system, unmount the old root and then execute the alternative rootfs /sbin/init as PID1.

mount -t ext4 -o loop,rw "$img" "$NEWROOT" >/dev/null 2>&1 || :
  mountpoint -q "$NEWROOT" 2>/dev/null || \
    mount -t ext4 -o loop,ro "$img" "$NEWROOT" >/dev/null 2>&1 || return 1

  [ -x "$NEWROOT/sbin/init" ] || return 1

  mkdir -p "$NEWROOT/.oldroot" "$NEWROOT/proc" "$NEWROOT/sys" "$NEWROOT/dev" >/dev/null 2>&1 || return 1
  cd "$NEWROOT" 2>/dev/null || return 1
  pivot_root . .oldroot >/dev/null 2>&1 || return 1

  cd / 2>/dev/null || :
  mount --move /.oldroot/dev /dev 2>/dev/null || :
  mount --move /.oldroot/proc /proc 2>/dev/null || :
  mount --move /.oldroot/sys /sys 2>/dev/null || :
  umount -l /.oldroot 2>/dev/null || :
  exec /sbin/init

Building an alternative rootfs

Now, we just need an image to boot from… You can find the buildroot external tree I used here.

The first step is to get to a system that compiles… And this is not always a walk in the park. Some of the issues along the way were due to the provided toolchain, kernel source, and Mediatek specific quirks.

1. Getting the kernel to compile (in order to have new modules in the rootfs)

The kernel is released as a .tar.zst-part-aa and .tar.zst-part-ab which is not really what buildroot expects. Moreover, inside this archive, there is also the Wifi driver source. So in order for buildroot to be able to use this, some gymnastics is needed in a Makefile extension.

2. Getting the Wifi drivers to compile

Next to that, still in the same makefile extension, I’ve added a LINUX_POST_BUILD_HOOKS += LINUX_BUILD_CONNECTIVITY_CMDS as a kernel post build hook to compile the Wifi drivers. but due to some require path issues, I had to create a patch to the wifi driver makefile

3. Building an image

Since I’m not going to have much in my image, only the rootfs, I don’t need a partition table, so Buildroot will just generate a blob with an ext4 rootfs in it that I can directly mount as a loop device.

image buildroot-kobo.img {
	hdimage {
		partition-table-type="none"
	}

	partition rootfs {
		image = "rootfs.ext4"
	}
}

Running the image for the first time

I created an init script to start usb networking when my system is initialized, it helps debugging in an easy way without the quirky jumper wires when using UART.

The buildroot image needs to be placed in .buildroot/buildroot-kobo.img on the userdata partition, so I just need to start the Kobo in it’s original OS, make it act as a mass storage device, and simply copy paste my image in the right folder.

I have also created to init scripts to support the E-ink screen that I won’t detail here but after booting (and obviously many trials and errors that wouldn’t fit this article’s narrative), here’s what we have :star_struck:

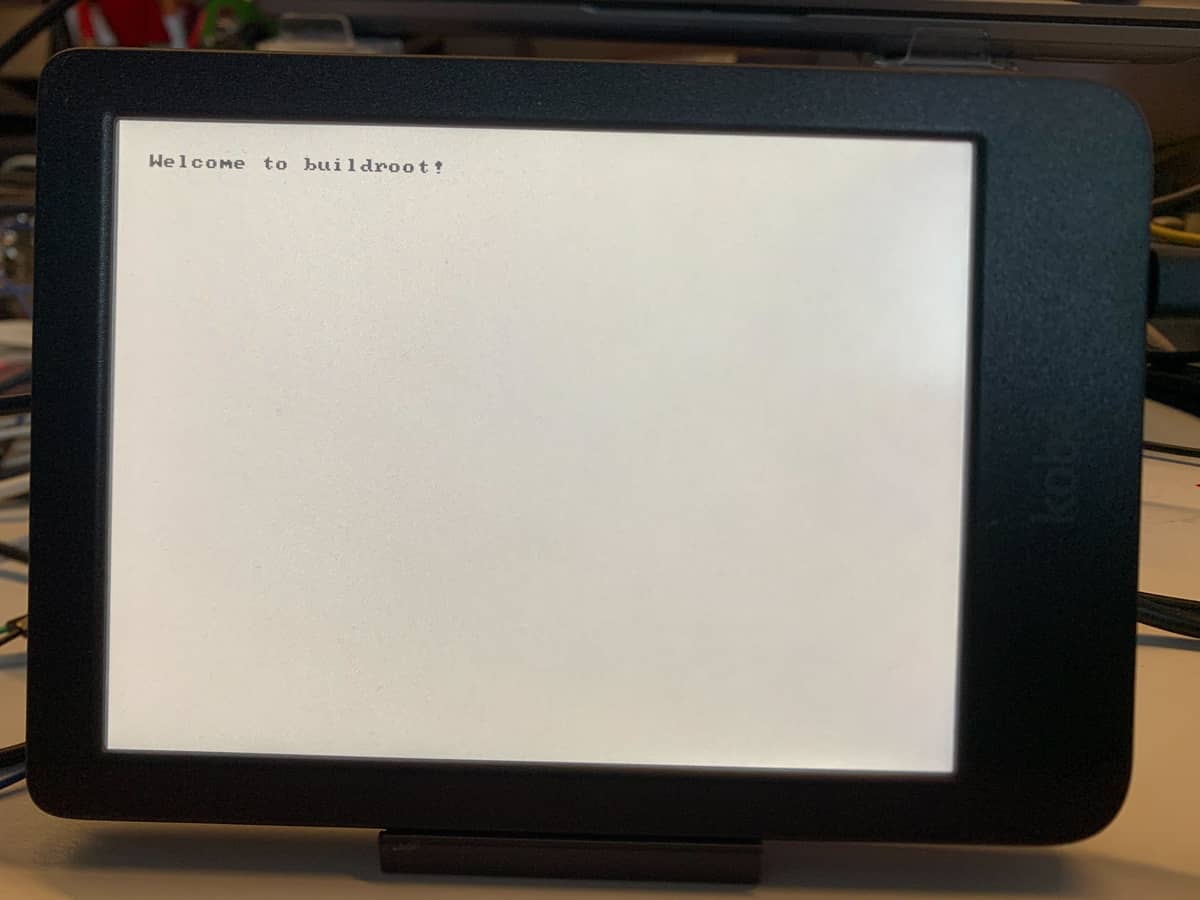
Probably not the most impressive image you’ve ever seen but this is quite a win :confetti_ball:

We can connect to it with usb and see that indeed, we are now running buildroot.

# cat /etc/os-release 
NAME=Buildroot
VERSION=2025.05.3-1-g85c588cdf9
ID=buildroot
VERSION_ID=2025.05.3
PRETTY_NAME="Buildroot 2025.05.3"
# 

Now do Nerves!

The first step to porting Nerves on anything is to first have a working Buildroot system. Now that it’s done, I can move to the next step and try running Nerves on it. I hope I can find workarounds to any future roadblocks ahead of this. But so far so good. I’m running the latest buildroot, on a 4.9 Android kernel full of Mediatek patches so I’m sure I will have to figure some more stuff out.

Will the next picture show a working Nerves system?

9 Likes

From a working buildroot image to a booting Nerves System

From my past experience porting Nerves on devices, when you reach the point where you have a working buildroot system, you have made 70% of the work already, and what’s left is to make sure you get a few things ready:

  • Create your Nerves system project boilerplate, following the usual anatomy of a Nerves system
  • Create a nerves_defconfig with the proper Nerves specific options and linking relevant parts to the Nerves System BR external tree config files and scripts
  • Move all packages you needed for your buildroot system to your Nerves System project
  • Write the fwup configuration for your device
  • Make sure your fw_env.config fits your fwup configuration

Although most of this can be “standardized”, there is always something specific about the devices we try to run Nerves on, and it can make it more or less complicated to get to a fully functioning system. But usually, just to see a system boot (not supporting all the board’s features for instance), you don’t need much.

In this case though, we can call my setup a bit “unorthodox”. I’m trying to run Nerves from a loop device created from a binary file in one of the ereader’s partitions… Moreover, I can’t change the kernel, so I’m stuck with a 4.9 Android kernel, and a provided toochain using GCC 4.9. So I expect some compilation issues when using a recent buildroot…

Getting all required packages to compile

Standards matter

The first thing that I stumbled upon when compiling the system were errors like these:

error: 'for' loop initial declarations are only allowed in C99 or C11 mode
     for (size_t counter = 0; counter < length; counter++)
     ^
note: use option -std=c99, -std=gnu99, -std=c11 or -std=gnu11 to compile your code

This is due to the fact that our compiler supports the C89 open standard by default for C code, and in that standard, initial declaration in for loops need to be outside the for statement, like this:

size_t counter = 0;
for (counter; counter < length; counter++)

So you need to tell the compiler to use another standard. And the way to do that is to override the buildroot packages .mk files in our own nerves_system.

Although the solution was the same for several packages, it had to be done differently for some, since all packages makefiles are not exactly the same, may use different variables, etc…

An example of this can be found already in the buildroot system where I had to add eudev to add Wifi support.

Missing headers

Due to the fact the toolchain is using an old GCC 4.9 compiler, there are some features missing, and one of them was the lack of the getrandom function in sys/random.h.

This function is called by erlinit in the seedrng.c and it falls back to using /dev/randomin case of an issue (as far as I understood what it does). It means that I can just write a “stub” that will return -1 (fail) with a specific error type, and it should work.

static inline ssize_t getrandom(void *buf, size_t count, unsigned int flags)
{
    (void)buf; (void)count; (void)flags;
    errno = ENOSYS;
    return -1;
}

Missing constants in sysroot headers

When compiling Vintage_net, it seemed that some constants were missing, I don’t have much clue what these constants do, but they were apparently added in later kernels. I was glad to have Claude in my life for this one tbh, and he gave me a nice patch to add to my system, in the form of an af_compat.mk file.

define AF_COMPAT_APPEND_HEADERS
	for hdr in \
		$(STAGING_DIR)/usr/include/linux/socket.h \
		$(HOST_DIR)/arm-buildroot-linux-gnueabihf/sysroot/usr/include/linux/socket.h; do \
		if [ -f $$hdr ] && ! grep -q "AF_KCM" $$hdr; then \
			printf '%s\n' \
			'#ifndef AF_KCM' \
			'#define PF_KCM 41' \
			'#define AF_KCM PF_KCM' \
			'#endif' \
			'#ifndef AF_IB' \
			'#define PF_IB 27' \
			'#define AF_IB PF_IB' \
			'#define PF_MPLS 28' \
			'#define AF_MPLS PF_MPLS' \
			'#endif' >> $$hdr; \
			"#endif" >> $$hdr; \
		fi; \
	done
endef

Patching Cairo

Another one I wouldn’t have been capable of figuring out is with Cairo and the fact that compiling with GCC 4.9 with the compile flag -O3 generates invalid instructions. But it seems that changing thi globally was not working so Claude figured out that the issue came from a very specific file and proposed a patch for it, that I still don’t fully understand… I am also not sure why Cairo is in every nerves_defconfig out there.

--- a/src/cairo-ft-font.c
+++ b/src/cairo-ft-font.c
@@ -38,6 +38,10 @@
  *      Carl Worth <cworth@cworth.org>
  */

+#if defined(__GNUC__) && __GNUC__ == 4
+#pragma GCC optimize ("O0")
+#endif
+
 #define _DEFAULT_SOURCE /* for strdup() */
 #include "cairoint.h"

Getting erlang to compile

There were a few options that needed to be added to the C flags, such as --disable-year2038 which is a problem with systems that represent time as 32-bit signed integers.

Indeed, the maximum date you can represent using this is January 19, 2038. The solution is to move to 64-bit which we can’t do here… So we need to disable it to avoid compilation errors.

I also had to explicitely tell erlang where to find supporting libraries for the compilation with erl_xcomp_sysroot.

Creating the fwup configuration

Since we are not running in a traditional setup, we don’t have a boot partition. It means out image looks like this:

# +----------------------------+
# | MBR                        |
# +----------------------------+
# | Firmware configuration data|
# | (formatted as uboot env)   |
# +----------------------------+
# | p0*: Rootfs A (squashfs)   |
# +----------------------------+
# | p0*: Rootfs B (squashfs)   |
# +----------------------------+
# | p1: Application (f2fs)     |
# +----------------------------+

This simplifies our configuration, so after some cleanup and setting up the environment variables to point to the right loop devices and making changes to the config files in /etc, I was ready to go to the next step.

# In fwup_include/fwup-common.conf
define(NERVES_FW_DEVPATH, "/dev/loop0")
define(NERVES_FW_APPLICATION_PART0_DEVPATH, "/dev/loop0p2")
# In erlinit.config
-m /dev/loop0p2:/root:f2fs:nodev:

Changing the init script

My image is now a bit more complex than before, and I need the original Kobo system to be able to read a squashfs partition. Since there are some modifications I will need at boot, I will also need to use overlayfs to make sure I can boot.

    insmod /mnt/onboard/.buildroot/modules/4.9.77/kernel/fs/squashfs/squashfs.ko 
    insmod /mnt/onboard/.buildroot/modules/4.9.77/kernel/fs/f2fs/f2fs.ko

    losetup -Pf "$img" || return 1
    mount -o ro /dev/loop0p1 "$NEWROOT" || return 1

    # --- tmpfs copy for writable root ---
    mkdir -p "$MERGED"
    mount -t tmpfs tmpfs "$MERGED" || return 1
    cp -a "$NEWROOT/." "$MERGED/" || return 1

    # --- pivot root ---
    mkdir -p "$MERGED/.oldroot" "$MERGED/proc" "$MERGED/sys" "$MERGED/dev"
    cd "$MERGED" 2>/dev/null || return 1
    pivot_root . .oldroot >/dev/null 2>&1 || return 1
    cd / 2>/dev/null || :
    ...
    exec /sbin/init

The full scipt can be found here.

The first boot

It was now time to try it out… And after some tweaking in the init script, I finally saw this after manually doing a modprobe g_ether in my serial console and trying ssh nerves.local.

You’ll notice that a few things are not quite right. It seems some things are not read properly, and the application part is not mounted.

Whenever you see these “UNKNOWN”, and Valid (unknown) on the firmware line, this usually means that you didn’t configure your fw_env.config properly, or that the uboot_env part of your image is somehow corrupted, so you should double check that the partition offsets in your fwup-common.conf and your fw_env.config actually match. In my case, it was a misconfiguration.

Fixing the application partition mount issue was also rather easy, I didn’t use the right loop device in my erlinit.config

# In fw_env.config
/dev/loop0	0x2000		0x2000		0x200			16

I made sure the sizes were correct for the uboot_env variables, where Nerves stores information about the platform, architecture, serial, active partition, etc…

I also made a couple of changes to my erlinit.config to load the g_ether module before the Erlang VM starts and fix it with the correct loop device.

--pre-run-exec modprobe g_ether
-m /dev/loop0p2:/root:f2fs:nodev:

And after reuploading the image on that userdata partition, there I was, with a booting Nerves system :confetti_ball:

Next steps

I still have work to do in order to really use this device. The first step is to add Wifi support like I did in my buildroot system, as well as add all I need to be able to manipulate the eInk screen.

There is also a big limitation to my current setup. Using loop devices from files, you can’t rewrite the filesystem when the file is mounted, which means that the usual mix firmware upload doesn’t work and each time I want to update my firmware, I have to boot the ereader on the Kobo OS to mount it as a mass storage device and copy paste the full .img file generated with mix firmware.image. It’s cumbersome but it works.

Something I can try to fix this is resize the userdata partition on the device to free up space at the end of the eMMC. Then I can create an extra partition and flash a full disk image on it like I did on the fairphone 2 with kpartx. But that’s for later.

My current todo list is:

  • Add Wifi initialization
  • Allow the use of the eInk screen in pure Elixir

That’s a fun way to start 2026… :nerd_face:

12 Likes

I am thoroughly enjoying this series and I appreciate it’s a material amount of work to document and write it. You tell the story really well too. Thanks for sharing - and some incredibly spelunking.

6 Likes

I believe Cairo is in some systems to support Scenic by default.

1 Like

I was wrong

In my previous post, I wrote that

Using loop devices from files, you can’t rewrite the filesystem when the file is mounted

I said that it prevented me to use mix upload and the usual Nerves firmware update cycle. Well, It turns out that when I created my Nerves System, I made a mistake in my fwp.conf. The problem was that for the Kobo, I only have 2 partitions (rootfs and application), but the standard for Nerves is 3 partitions (+boot).

During a firmware update, fwup checks that partitions are at particular offsets, and the default in fwup.conf to do this is to use require-partition-offset(1, ...) in the upgrade tasks. But partition 1 is our application partition in this case, not the rootfs! And that’s why it was failing.

Changing this to require-partition-offset(0, ...) solved the issue and I can now update my firmware without copying it manually anymore :slight_smile:

This means that running Nerves from an image file mounted as a loop device, although non-standard, is a viable solution on “exotic” devices for which we have root access to.

Before I forget again…

When I explained the packages I had to update in order to make them work with a 4.9 Android kernel, I forgot to talk about a very important one.

In this image, you can see nerves_uevent not started in the Applications part of NervesMOTD. The 4.9 kernel can produce UEvent messages that exceed the 64 KB maximum payload size supported by 2-byte packet framing, causing the process to crash when receiving large kernel event messages.

The solution was to upgrade the packet framing from 2 bytes to 4 bytes on both the C and Elixir sides, and to add safe deserialization so that any corrupt or truncated frames are gracefully dropped instead of crashing the process. In all honesty, alghouth I understand why it crashed, I don’t think I would have solved it as easily without the help of Claude :robot:

I therefore had to create my own fork of NervesUEvent to solve this issue.

Now let’s get some wifi…

The Clara relies on proprietary firmware and binaries that live on the original partitions. And I have no clue how much I can redistribute these in my own libraries, so to avoid taking any risks and since my goal is to run Nerves alongside the original Kobo operating system, I will need to:

  • Copy the blobs I need from the original partitions
  • Implement the Mediatek scripts that load the wifi drivers in pure Elixir
  • Implement the Wifi initialisation script in VintageNet

The birth of “blob_copy”

Since I need specific proprietary binaries for both wifi and eink support, I decided to create a dedicated project for this, which might even be useful in future work. BlobCopy mounts a block device partition read-only, copies files according to a manifest (supporting individual files, directories via cp -ar, and glob patterns), marks completion with a marker file, and distinguishes critical entries from non-critical ones. Any missing critical entry will stop the execution with an error, a missing non-critical entry will raise a warning.

This is an example of how it’s used to support wifi on the Clara Colour:

blob_copy: [
    partition: "/dev/mmcblk0p10",
    mount_point: "/tmp/kobo-wifi-mount",
    marker_file: "/var/lib/kobo-wifi-firmware-copied",
    log_prefix: "KoboWifi",
    partition_wait_timeout: 30_000,
    mount_retries: 10,
    mount_retry_delay: 1_000,
    manifest: [
      # WiFi/BT firmware blobs — entire firmware directory tree
      %{source: "lib/firmware", dest: "/lib/firmware"},
      # WMT loader — hardware init and module auto-loading
      %{source: "usr/bin/wmt_loader", dest: "/usr/bin/wmt_loader", critical: true},
      # WMT launcher — firmware loading daemon
      %{source: "usr/bin/wmt_launcher", dest: "/usr/bin/wmt_launcher", critical: true},
      # WMT configuration files
      %{source: "etc/*wmt*", dest: "/etc"},
      %{source: "etc/*WMT*", dest: "/etc"},
      # Wireless subsystem configuration
      %{source: "etc/Wireless", dest: "/etc/Wireless"}
    ]
  ]

This ensures that all binaries we need are copied to our rootfs at boot. This means we need to make our rootfs writable in some way, which is not the intended way to deal with your rootfs in Nerves. The only way I found to get it to work is by copying the entire rootfs in a writable tmpfs at boot and to actually mount that tmpfs to /. this is all handled in my custom kobo-init script:

# --- tmpfs copy for writable root ---
    log "mount tmpfs for writable root"
    mkdir -p "$MERGED"
    mount -t tmpfs tmpfs "$MERGED" || return 1
    log "copy SquashFS root into tmpfs"
    cp -a "$NEWROOT/." "$MERGED/" || return 1

This means that the blobs don’t persist across reboots, which is acceptable in this setup. The source code for BlobCopy can be found here.

Bringup of the wifi device in Elixir

There are two parts we need to cover:

  • Prepare the system for using the wifi device: copy the needed firmware and binaries (config shown above), then actually loading the kernel driver for the device. It turns out that the wifi device driver is also in the Kobo github repo and part of the kernel archive. What’s interesting though is that the wifi device driver (wmt_chrdev_wifi.ko, wlan_drv_gen4m.ko, and wmt_cdev_bt.ko) sources are not part of the kernel source tree and must be in a specific directory on the rootfs for the proprietary wmt_loader binaries to work. This is the kind of non-standard proprietary quirks we have to deal with and fortunately, since we have root access to the e-reader, we can understand what happens in the original system and implement it in Elixir.
  • Initialize the device with VintageNet: for this part, I could have just reimplemented the original bash script in Elixir, but I wanted to have a seamless integration with VintageNet so it has complete control over the bringup and teardown of the device. I wanted for VintageNet to really own the device once it was available. After some research, I found out that with VintageNet, we can implement a PowerManager for our device, which gives total control to VintageNet.

The whole sequence and behavior to have wifi running on the Kobo Clara Color is implemented in a dedicated KoboWifi library. Here are a few details on how it works in practice:

Loading and unloading kernel modules in Elixir

I decided to build another library to handle loading kernel modules in a generic way. I don’t need it for the eink screen support but this could be handy in future work. I called this library KmodLoader. This library is being used in KoboWifi to load the necessary kernel modules or mount specific file systems needed by the modules themselves.

Initializing the device with VintageNet

We need to implement VintageNet.PowerManager behaviour so the WiFi init is driven by VintageNet’s lifecycle.

On power_on, it waits for all files to be copied via KoboWifi.Init.wait_until_ready, then executes the full MediaTek init:

  • mount configfs/debugfs
  • create an Android-style /system/etc/firmware symlink
  • insmod wmt_drv.ko with KmodLoader
  • wait for /dev/wmtdetect
  • run wmt_loader (also handling its quirk of returning exit code 255 even on success by parsing stdout for “do kernel module init succeed: 0”)
  • wait for /dev/stpwmt
  • start wmt_launcher as a supervised daemon
  • write “1” to /dev/wmtWifi (with up to 5 retries :crossed_fingers:)
  • poll for wlan0 in /sys/class/net/.

Yeah… I know, this seems like a pretty weird init cycle, thank you Mediatek for making things easy… :roll_eyes:

On power_off, modules are unloaded in reverse order.

And once all of this is done, we can finally have Wifi on our Kobo Clara Colour with Nerves :star_struck:

Hello wlan0 :waving_hand:

Wrapup

Getting wifi to work on the Kobo Clara Colour with Nerves meant dealing with a lot of proprietary MediaTek quirks that were never designed to run outside of Android.

Binaries that exit 255 on success because they try to set Android system properties that don’t exist. Kernel modules that live outside the kernel source tree and must sit in a specific directory for a proprietary loader to find them. A wifi enable sequence that involves writing “1” to a character device, hoping for the best… An Android-style /system/etc/firmware symlink that has to exist for the firmware loading daemon to locate its files. And all of this on a read-only SquashFS rootfs that I had to copy into a tmpfs just so I could write the proprietary blobs somewhere :upside_down_face:

None of this is standard Nerves, and none of it is documented anywhere. I had to figure it out from the stock init scripts with, I must admit, a lot of help from Claude :robot:, then trace through the MediaTek WMT stack, and figure out what each binary actually does by running it and reading its output on the original system.

To make it all work, I ended up creating several projects:

  • blob_copy, a generic library for extracting proprietary binaries from block device partitions at boot, with support for files, directories, and glob patterns, because you never know what non-standard paths the next vendor will come up with.
  • kmod_loader a generic library for loading and unloading out-of-tree kernel modules via insmod/rmmod. Because modprobe is useless when your .ko files don’t live in /lib/modules/, another gift from MediaTek…
  • kobo_wifi, the full wifi stack for the Kobo Clara Colour, implementing VintageNet’s PowerManager behaviour so VintageNet owns the entire device lifecycle. It handles the complete MediaTek init process, from mounting configfs to polling for wlan0, including all the proprietary quirks along the way.

That’s what it takes to run Nerves on hardware that was never meant for it, but honestly, that’s also what makes this fun :nerd_face:

It took me a while to continue this series due to the amount of elixir code I had to cleanup, but it’s almost finished now. And from the picture I just shared, you can probably guess what the next post will be about…

Stay tuned for some eink magic in Elixir :magic_wand: :man_mage:

7 Likes

honestly this is sick , is there a way to get this device ?

Yes, you can just buy it, it’s one of the devices currently on sale by Kobo.

Can you read from the Kono rootfs when connecting it over USB or something? You could have your script extract the blobs then? Copying rootfs to a tmpfs seems like it both would eat into boot time and grab a good chunk of memory.

It is fine for now, but indeed, I could create a mix task that:

  • Connects to the Kobo through ssh
  • Copies what is need in the firmware’s rootfs_overlay on the host
  • Packages the firmware with the copied blobs
  • Sends the firmware at the right place on the Kobo
  • Deals with init script updates if any (I could package my init script as an elixir dep)

That is way more elegant than what I’m doing for now indeed :thinking:

Thanks for the suggestion! That would indeed make all this more “production ready” for folks that want to buy a Clara Colour to play with Nerves.

1 Like